So you’ve got a 3D printer and want to start printing. Assuming you’ve already got an STL file to print from, you have to open a slicer program, Import the STL file and slice it to create your GCode file. Then you have to upload that file to a micro SD card and insert the card into the printer, or if you connected the printer via USB or network, you have to send the GCode file to the printer. Once on the printer you will select “print” and wait while the printer does its thing.
But what if you want to run things more seamlessly? More automatically? With more monitoring and control over the print while it’s happening?
Then you’ll need something with an interactive interface. This is where a small Octoprint device comes into its own.
Now I say a small octoprint device because most times you see octoprint loaded on a Raspberry Pi or equivalent.
In fact, Octoprint is open source and it will run on pretty much any platform made after 2008.
The main reason for using a small device such as a Raspberry Pi or alternative is that the power consumption of these machines is around 5 Watts.
A PC or equivalent has a minimum drawer of 20 watts. if you’re using Windows on these PCs, the power consumption is considerably more. so while you may be saving on the hardware costs if you’re using an old machine, you’ll pay for it in the long run with higher electricity costs.
So I’m going to show you how to build a Raspberry Pi equivalent machine, installed with Linux, and configured with a cheap webcam, and plugins, so you can monitor and manage your prince, and even help you tram and level your printer.
First the Hardware
Now I said Octoprint runs on Raspberry Pi, but I’m going to install it on an equivalent machine, mainly because it’s cheaper, but also the installation is a little bit more complex, and there’s not much guidance out there, on actually installing Octoprint on these machines.
Mainboard
For the main board, I chose the RockPi 4C Plus.
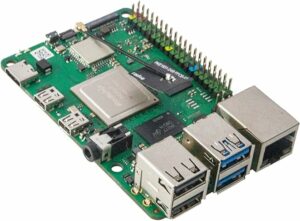
For the nerds
This SBC consists of a Rockchip RK3399-T SoC with an ARM dual cortex-A72@1.5GHz and quad cortex-A53@1.0GHz CPU. The Integrated GPU is an ARM Mali – T860MP4 which supports OpenGL ES 1.1 /2.0 /3.0 /3.1 /3.2, Vulkan 1.0, Open CL 1.1 1.2 and DirectX 11.1. The memory is 4GB of 64bit dual-channel LPDDR4 RAM and offers storage on both Micro SD via a hot-swap port) and eMMC (via a socket on the underside of the board).
Video is provided through the GPU to dual micro-HDMI ports one of which will support a display up to 4Kp60 resolution and the other up to 2Kp60. It has two USB2 host ports, one USB3 OTG/Host port and one USB3 Host port. High-quality stereo audio output is delivered through a 3.5mm audio jack. It comes with built-in 802.11 b/g/n/ac (WiFi 5) Wireless LAN, Bluetooth 5.0 with BLE and one Gigabit Ethernet port.
Power is supplied by a 5volt, (minimum) 3 amp power supply through a USB-C port at the side of the mainboard.
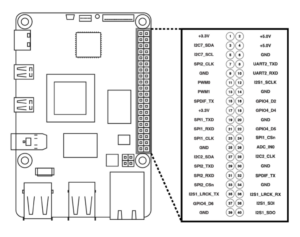 There is a 40-pin user GPIO which supports a wide range of interface options including:
- two UART buses
- two SPI buses
- two I2C buses
- one PCM/I2S bus
- one S/PDIF bus
- one PWM bus
- one ADC bus
- six GPIO buses
- two 5V DC power pins
- two 3.3V power pins
The GPIO header is 97.5% (39/40) Raspberry Pi compatible.
I bought this SBC from Amazon. https://amzn.to/415HOJB
Case Options
Next, you are going to need a case to put it in. Again, Amazon comes to the rescue.
Option 1 – Separate Case and Monitor
| The Muzei Case for Raspberry Pi 4 fits the Rock Pi 4c Plus perfectly.
It comes with heat sinks for the SBC chips, a cooling fan that connects to the GPIO header and a US/’Canada USB-C power supply that is more than enough to power this mini-beast. The case is made from plastic with a clear polycarbonate-type cover allowing you to see the upper part of the Rock Pi, and slots at the front for the USB and Ethernet ports, at the side for the USB, HDMI and Audio ports and at the rear to access the micro SD card slot. The WiFi aerial from the Rock Pi routes neatly through the rear slot and can be attached to the case with double-sided tape. These are the cases I use. |
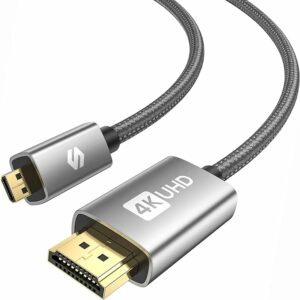
If you go for this option, you will likely need a Monitor with an HDMI input. and to connect to it a cable.
I purchased the cables I needed from Amazon. You can find them here: https://amzn.to/3uOF8UI.
| For the monitor, I used a 32″ TV.
It’s 1080p, but I don’t need it for hi-res games, and it’s nice to have an Alexa-enabled smart TV on my desktop. The bonus here is it allows me to control, via the Alexa app, the power supplies to my office lighting, 3D printers and CNC machines. |
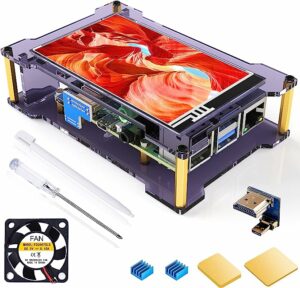
Option 2 – Integrated Monitor and open case
 You don’t need a monitor on the device full-time, as I’m going to show you how to securely operate the system remotely, but every once in a while you may need a console to do stuff with.
So a second option is to have a monitor that’s integrated with the Device.
You will still need a case for cooling, and you don’t want to get a massive monitor for occasional use, so the option I used here is, again from Amazon, https://amzn.to/3NeF3Qf
Storage
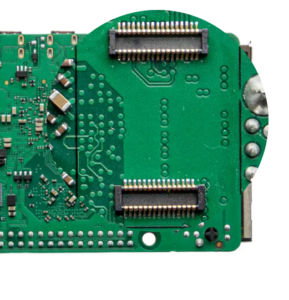
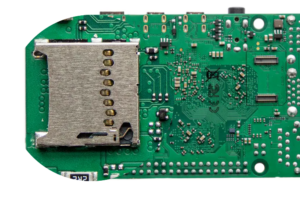
To install the operating system, you are going to need storage media. The RockPi 4C Plus has two options here.
At the underside, toward the centre, of the mainboard is an eMMC slot and at the rear underside is a MicroSD slot. The MicroSD slot is hot-swappable (although if the OS is installed on it, you can’t remove it while the system is running).
The eMMC option is easily installable but requires the dismantling of the SBC from the case to access it.
I generally install the OS on an eMMC module and use the MicroSD for data. This is what I’ll be showing you how to do.
| For the eMMC storage, I use a 256Gb module. To run an Octoprint device only, you can probably get away with a 64Gb module, but as I want the option to run Octoprint for both Marlin and Klipper devices, and the price difference between the modules is not that much, I opt for the larger one.
I also like the extra storage space for “other” Linux stuff I might want to add later. |
|
| For the MicroSD data card, again I opt for the largest available. They are a bit pricey still, but the price is coming down.
I chose SanDisk Ultra cards that you can get from Amazon. I’ve tried some Chinese knock-offs that are much cheaper, but reliability has proven to be an issue, and some of them do not perform to the specs they claim. If you are using these for data only, this probably doesn’t matter, but if you are using them for the bootable OS, then reliability and performance are critical concerns. |
Real-time Clock
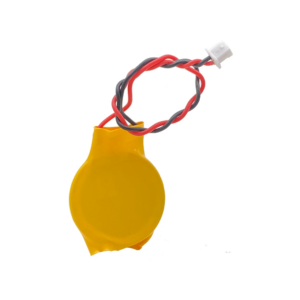 With small SBC systems, it’s generally not important to save the state of the machine between restarts, so they don’t come with a CMOS battery.
Because I’ll be installing Linux on the system and securing it, I wanted to have the CMOS backed up with a battery.
I found a supply of these batteries on AliExpress.
You can check these out here: https://bit.ly/CMOSBatt (ensure you get the polarity the correct way around.)
Assembly
Putting all the hardware together is relatively simple. Each of the components listed above comes with easy-to-follow assembly guides. Just remember, if you are opting for the eMMC boot option, don’t assemble the system until AFTER you’ve installed the OS. You’ll just have to take it all apart again.
Other Stuff
As with everything, there’s always going to be the need for other stuff to get things installed and working. One of the more obvious things is a PC or Laptop to download, and install the OS to the SBC.
If you opt for the eMMC install, you’ll need an eMMC to USD adapter, that allows you to insert the eMMC module into the PC/Laptop. ( https://amzn.to/3RsO2jf )
If you want to add a Camera to the Octprint device, you’ll need to source that as well. ( https://amzn.to/3TikPsC )
I’ll assume you either have a WiFi router or LAN switch/router and cables if you want to hardwire. Of course, you’ll need sufficient power receptacles in close proximity to your 3D printer to run the printer and the Octoprint device.
| I typically use an Uninterruptible Power Supply ( Battery backup) to prevent my 3D prints from getting ruined if there’s a brownout.
Again, size matters. Go for the largest UPS your budget will allow. Don’t forget you need a UPS with a KVa rating to match or exceed your system’s maximum load and the largest battery for extended runtime. For example: For this, I use the Cyberpower CP1000PFCLLCD. It’s not enough to complete a print during a power outage, but with Octoporint, it’s enough for me to shut the print down tidily, so I can restart it again later. And it’s enough to run right through an intermittent power glitch, or power surge without any damage to the print, printer or anything else attached to the UPS. Again, I source mine from Amazon. Using the Amazon Credit Card, I can get a nice cash-back reward as well! |
And then you need to choose which software package you want. I opted for Ubuntu, with a KDE desktop environment.
I’ll explain the decision behind this and how to retrieve and install the software in part 2.